Attention:
You need to check the date of your stock firmware. Then follow these rules:
1) Stock firmware versions on which you CAN install Vnish directly using the toolkit: February 2024 and earlier, and from December 2024 to August 2025.
2) Stock firmware versions on which you CANNOT install Vnish via the toolkit: Amlogic (A113D) control boards with firmware from September 2025 and newer cannot be flashed using an SD image.
3) If you have BITMAIN firmware installed from March 2024 to December 2024 or from September 2025 and newer (Exception: Amlogic (a113d) control boards with firmware from September 2025 and newer), first you need to install the stock update file up to September 2025. If you cannot find and install the stock update file up to September 2025 by yourself, then you need to use the INSTRUCTIONS for installing the stock SD image for your model and control board type in order to subsequently install the Vnish firmware using the TOOLKIT.
How to install Vnish firmware using Hashcore Toolkit
- Download Hashcore Toolkit from the official Vnish website (Be sure to unzip the archive)
- Open the Toolkit
- Click the “new ranges group” button
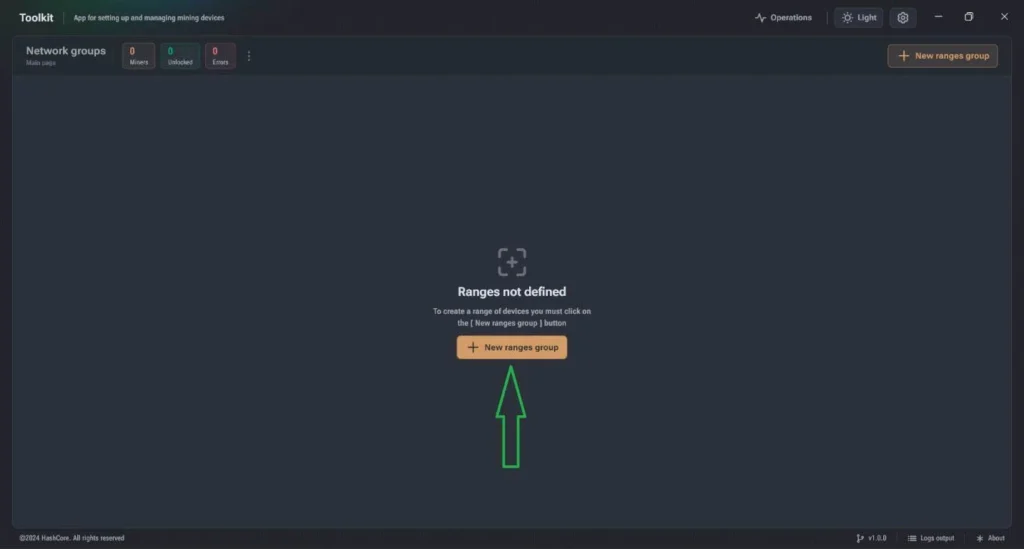
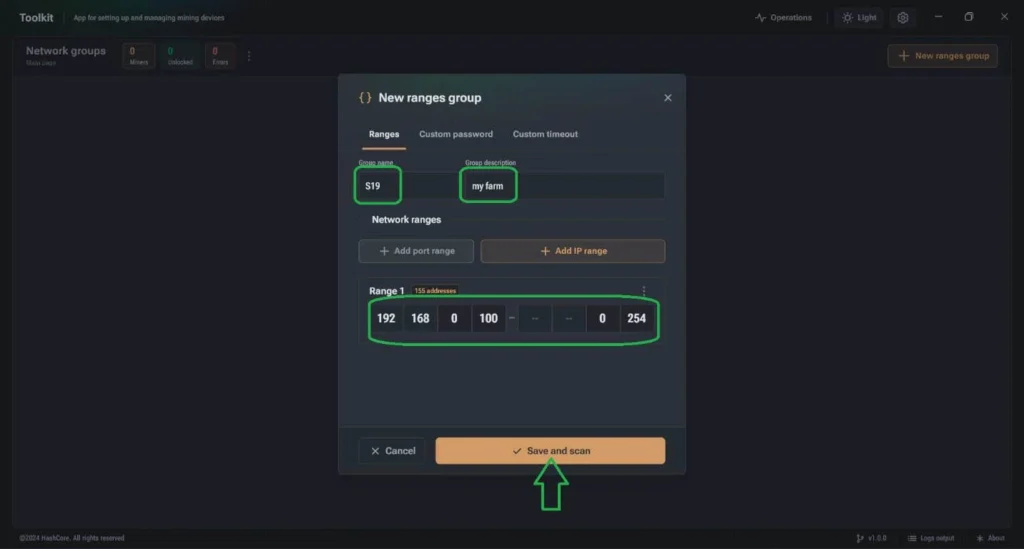
- 4. Now you need to create a group for the IP range:
- Select a name in the “Group Name” field.
- Place your description in the “Group description” field.
- Select the IP range in the range field.
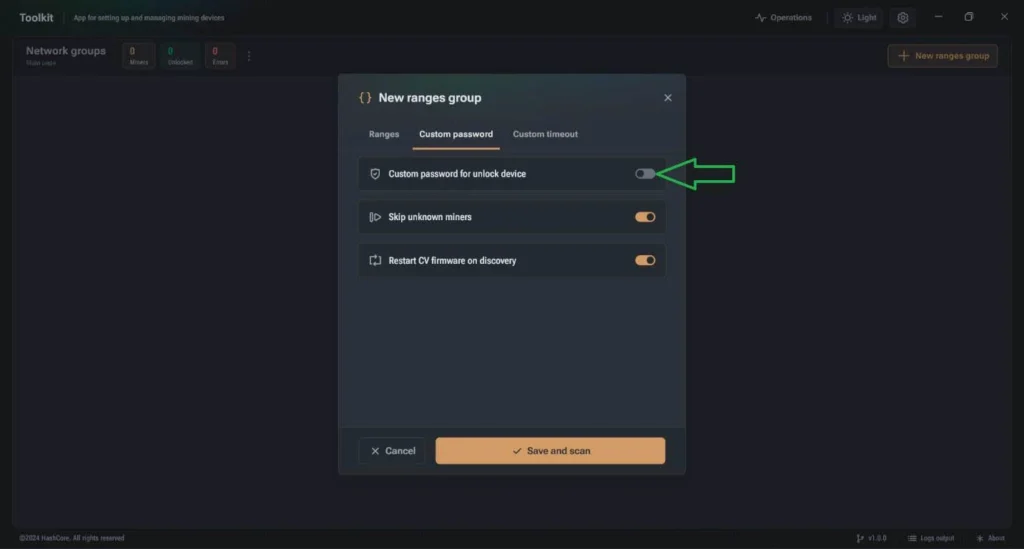
- If you changed the default (root) password, click the “Custom password” tab and enable “Custom password for unlock device».
- Then scroll down and turn on “Bitmain Firmware” and click the drop-down menu to see the password. In the “Password” field, you can specify your miner password.
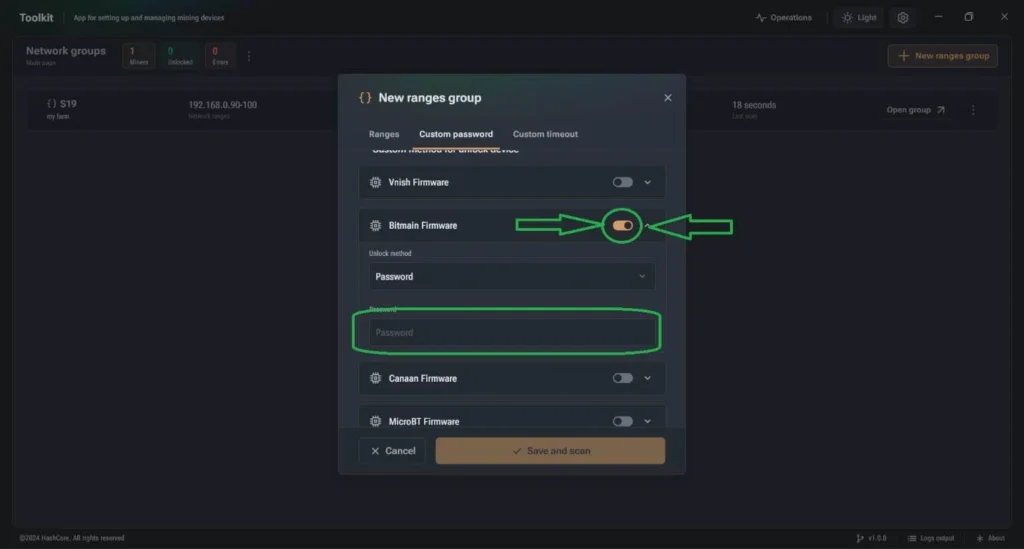
- 5. Click “Save and scan“.
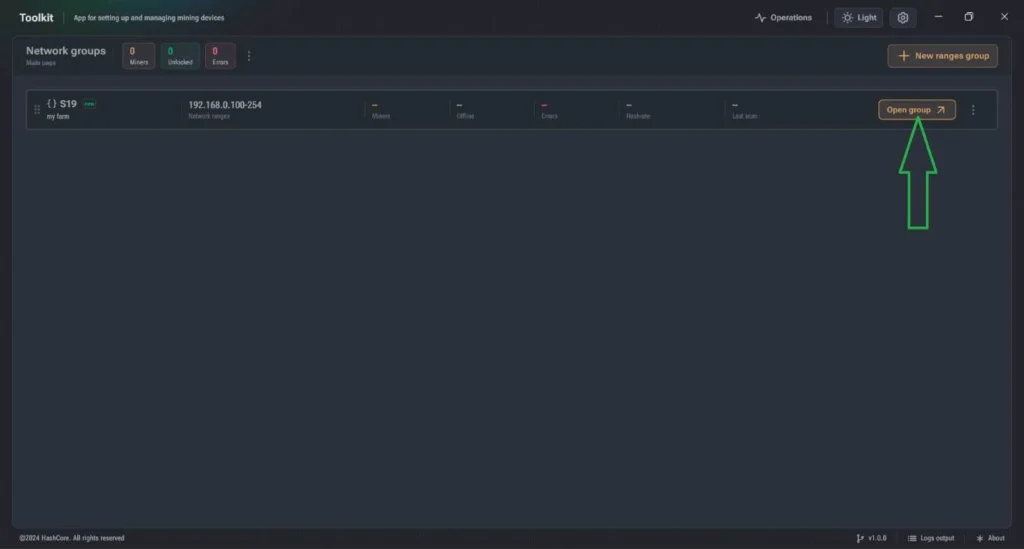
- 6. Click “open group” to see miners in the IP range.
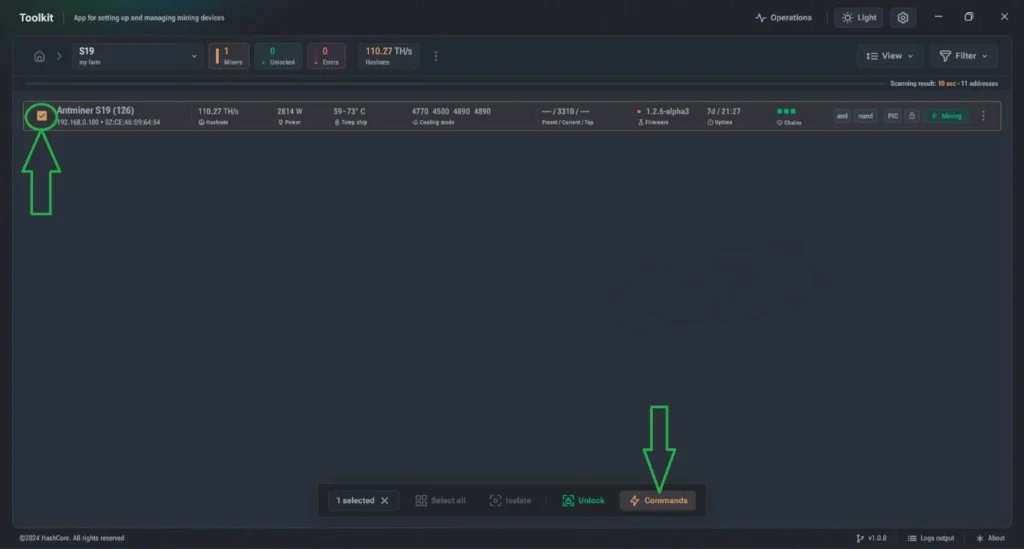
- 7. Now select the miner you want to install pre-downloaded Vnish firmware, and click the “Commands” button:
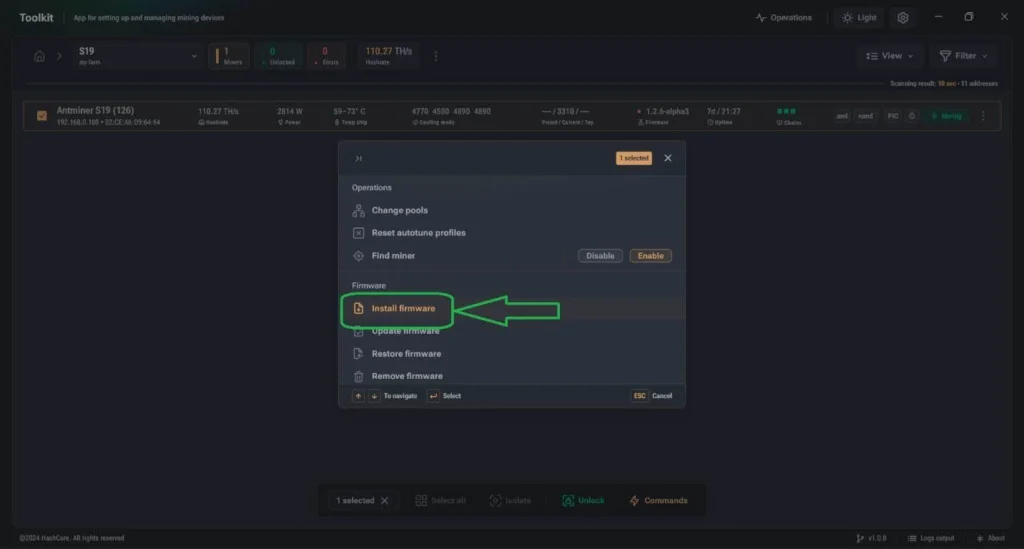
- 8. On the “Commands” page, click “Install the firmware“.
9. Then the installation page will appear: click the “Select” button to specify the folder where the firmware file is located, the file itself will not be visible – this is normal (the firmware files are inside (DO NOT UNPACK THE ARCHIVE WITH THE FIRMWARE!)), fill in the fields as shown in the figure below:
(with example file name: vnish-t21-aml-nand-v1.2.7-install.tar.gz)
- Firmware name: vnish
- Firmware version: 1.2.7

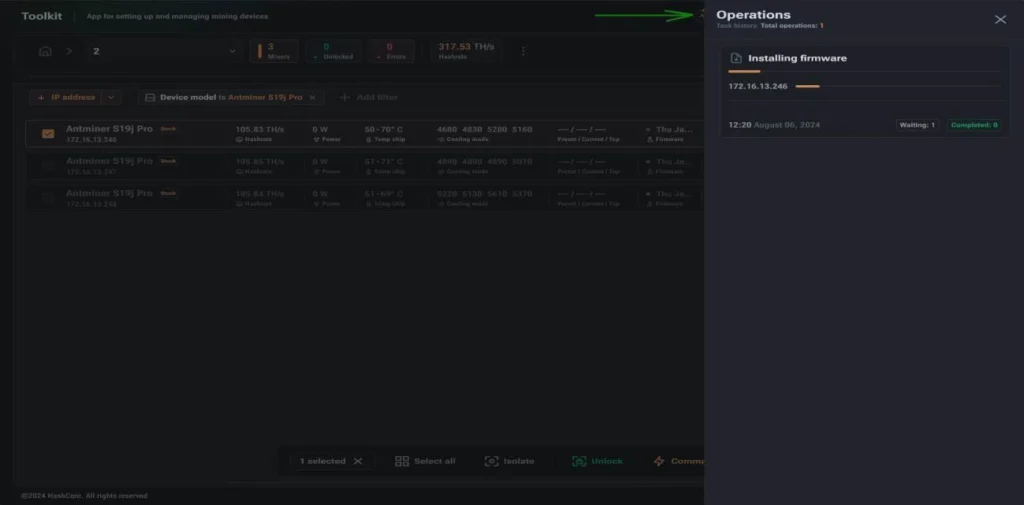
- 10. In the “Operations” section, you can view the installation process, if any error was made, the error decoding will be indicated
Notes
If a library availability error occurs when opening the Toolkit, install the latest supported versions of Visual C++:

If you have any questions or problems installing Hashcore Toolkit, we are happy to help you. To do this, write to us in support chat.
