ASIC Setup 21 / 19 / L9 / L7
Complete guide to configuring Vnish firmware
1
Unlock the ASIC (Default password: admin)
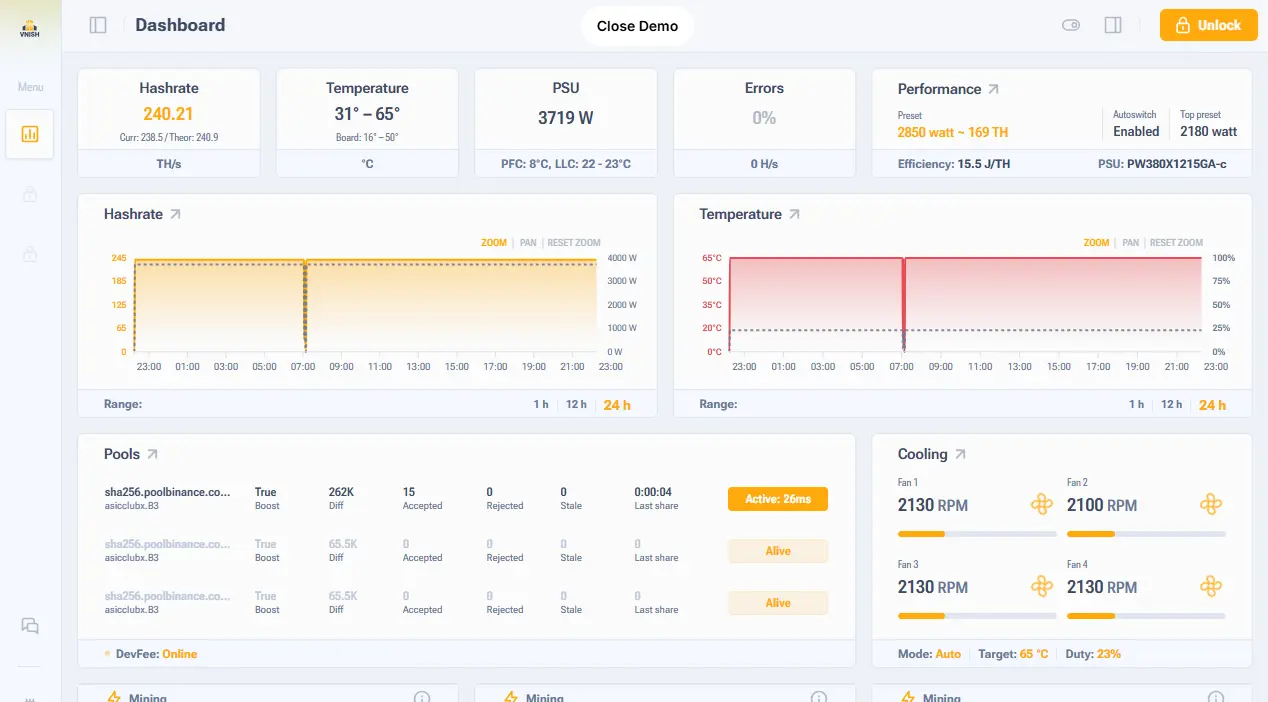
Mining Setup
2
Go to the “Mining” tab
3
Open the “Pools” section and enter your stratum addresses and worker name
4
Save the settings

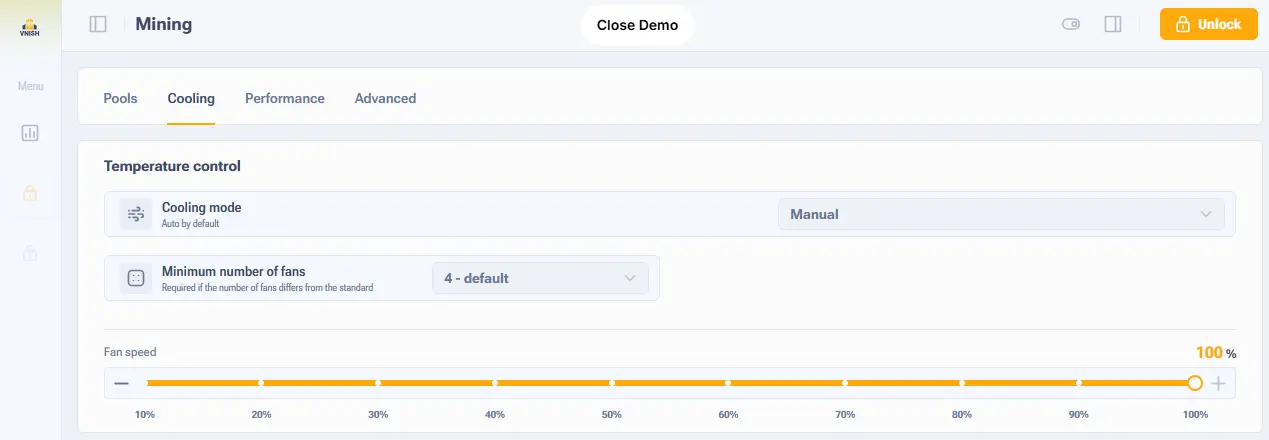
Cooling Setup
5
Go to the “Cooling” tab
6
Select the cooling mode
7
Set the “Target temperature” (if cooling mode is NOT “Auto”)
8
Save the settings
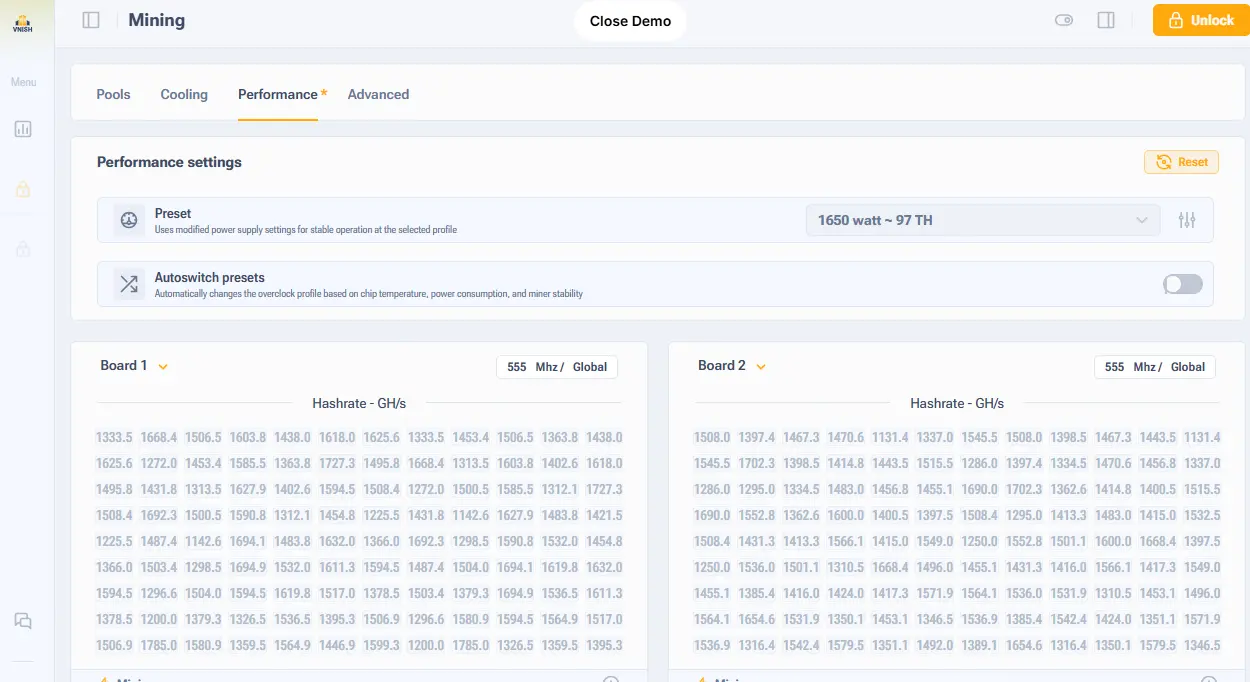
Performance Setup
9
Open the “Performance” section
10
Select the required profile
11
Save the settings
If the profile is not configured, autotuning will start automatically without reboots
Advanced Settings
16
Open the “Advanced” section
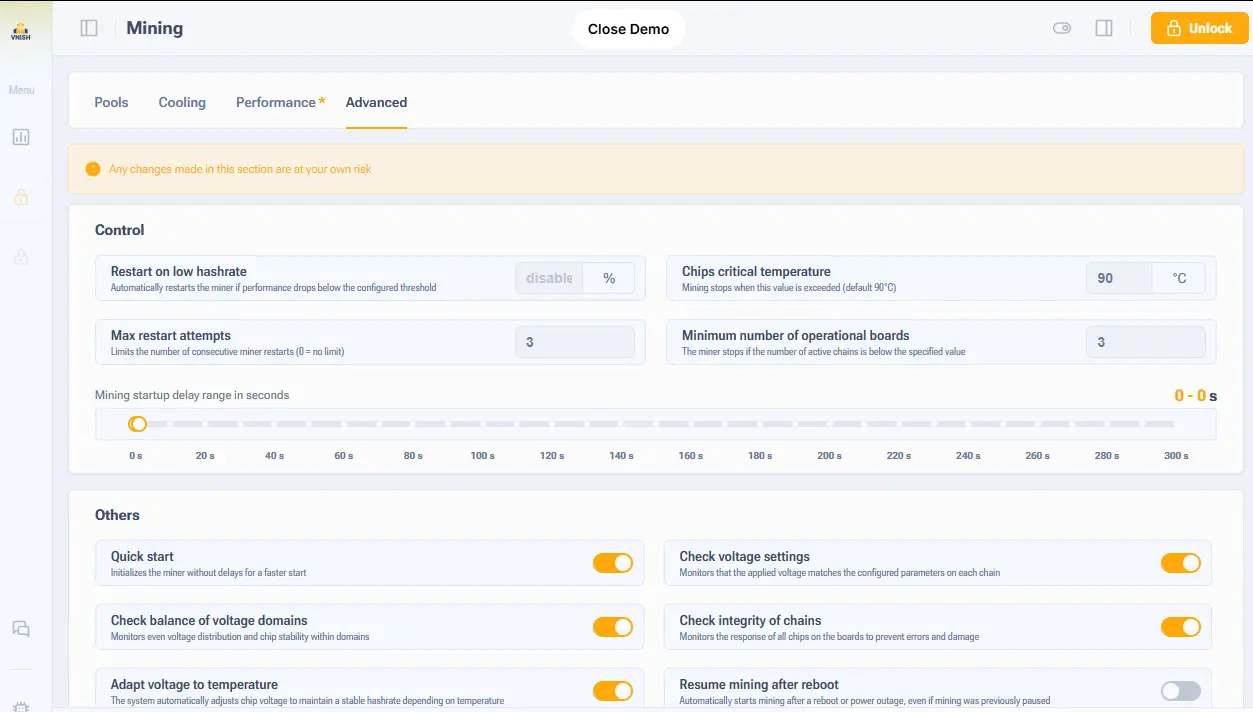
17
Set the “Critical chip temperature” (+15°C above the target temperature)
18
Function descriptions
- Restart on low hashrate — set as a percentage; triggers when hashrate drops from the expected level based on the selected profile. Recommended: 75%
- Critical chip temperature — temperature at which mining will stop; set 15°C above the target
- Maximum number of restarts — number of restarts when any hardware errors occur
- Fast start — sets the initial chip frequency on startup
- Check domain balancing — always enabled; a safety setting for the hardware
- Adapt voltage to temperature — increases voltage when chips are cold
- Check voltage settings — verifies correct voltage supply
- Check chain integrity — checks connections between chips
- Continue mining after reboot
- Lower profile on error
- Ignore faulty temperature sensors
- Increase chip voltage on startup
- Tuner bad chip hashrate threshold
19
Save the settings. After saving, click “Apply” settings
20
Check autotune status
Autotuning takes on average 1–2 hours. At the beginning, some chips may be unstable. After completion, the status will change to “mining” and uptime will begin.